There are many features in the
Trialex System but this section will focus on the minimum requirements necessary for
getting started. In order for a study to be conducted within the Trialex System, it
is required that the report object be defined. This object stores all the attributes
of reports such as listings, summary tables and figures. Once a study is defined,
the reports object is the first object defined before any of the Trialex tools will be
made available.
The first step towards defining a
new study in the Trialex System is to identify a physical path to the location of the
study. An example path to a study may be:
D:\Global\Project2\study3
It is recommended that a
subdirectory be created at the study level for the use of the Trialex System. The
name of this directory is decided by the user but it is recommended that a convention be
established and used across studies for consistency. An example subdirectory would
be:
D:\Global\Project2\study3\trialex
Once the location has been
established, go to the level design located in the study design area.

This is how all studies and
projects are set up. Determine which portion of the hierarchy or which project the
new study belongs to and click on it. Select the menu item "Add Sub-Level"
as shown here:
This will add the new study as a
sub-level to the project selected. A dialog box will then appear requesting
information about the new study. Enter a meaningful name identifying the study.
Note that the path location is the same one which has been determined from the
first step.
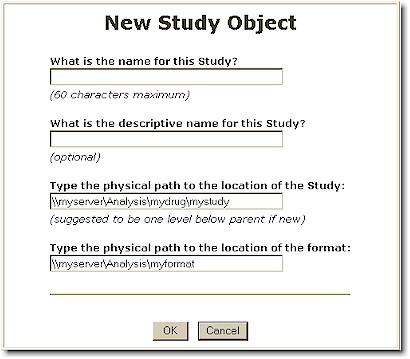
Click the OK button after all
entries have been entered. This will create a new study and automatically create the
following objects for the study: Data, Program and Reports. These new objects are
defined from the standards established within the hierarchy which has been set up.
It is possible to create a study
manually besides relying entirely on the Trialex System. This may be useful to give
the user a better understanding of the process of creating a new study. This process
described below is not comprehensive but rather the minimum steps required for a study to
function with the Trialex System.
In the event where the standards
are established for the current project, it may be useful to copy from an existing
study.
Follow the steps below to have a
study copied.
- Go to the level design diagram from
the study design area.
- Select the source study which is to
be copied and click on it. Select the menu item "Copy Current Level".
- Move up to the project level under
which the study will be created. Click and select the menu item "Paste as a
Sub-Level".
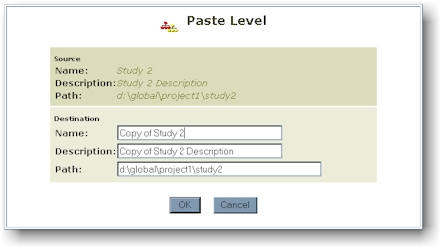
- Update the name, description and
the new physical path location of the new study before clicking the OK button.
This process will create a new
study based upon the source study. It will transfer the three objects: Data, Program
and Reports. If a dependency object is defined, it will transfer that as well.
Note that the paths are updated in the new objects and clarification notes will
document this update. An example of the update may be:
NOTE: Data Warehouse path has been
updated to: d:\global\project2\study3
NOTE: Data objects has been successfully copied and pasted.
NOTE: Programs objects has been successfully copied and pasted.
NOTE: Programs path has been updated to: d:\global\project2\study3
NOTE: Report path has been updated to: d:\global\project2\study3
NOTE: Reports objects has been successfully copied and pasted.
NOTE: Source data path has been updated to: d:\global\project2\study3
|